How to upload check signatures in Sage Intacct

Apr 16, 2020
1 min read
Many clients have moved to fully remote work situations, and with that comes the need to automate payment processing. Uploading check signatures in Sage Intacct will streamline payments for your organization and ensure vendors are paid on time. Here’s how to do so:
Create digital signature
To create a digital check signature to upload into Sage Intacct, follow the steps below.
- Sign your name in a 3.0"w by 0.36”h box.
- Scan the signature and save as a GIF or JPG file.
- Open the file and verify that it appears correctly.

Note: Your signature should fill the box as much as possible so it will not appear distorted on your printed checks.
Upload the check signature
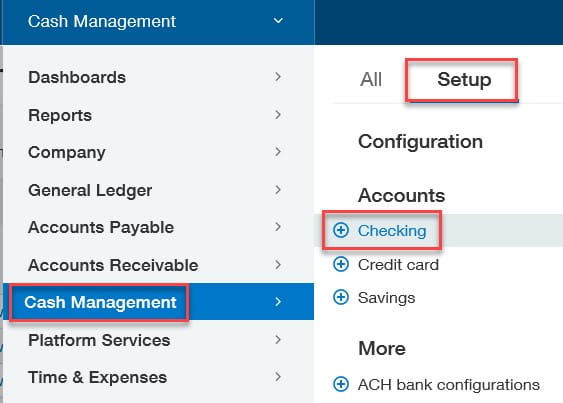
- Navigate to Cash Management > Setup > Accounts > Checking.
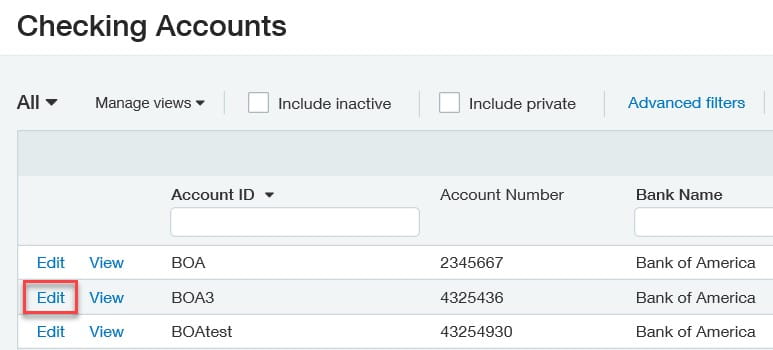
- Click Edit next to the appropriate checking account.
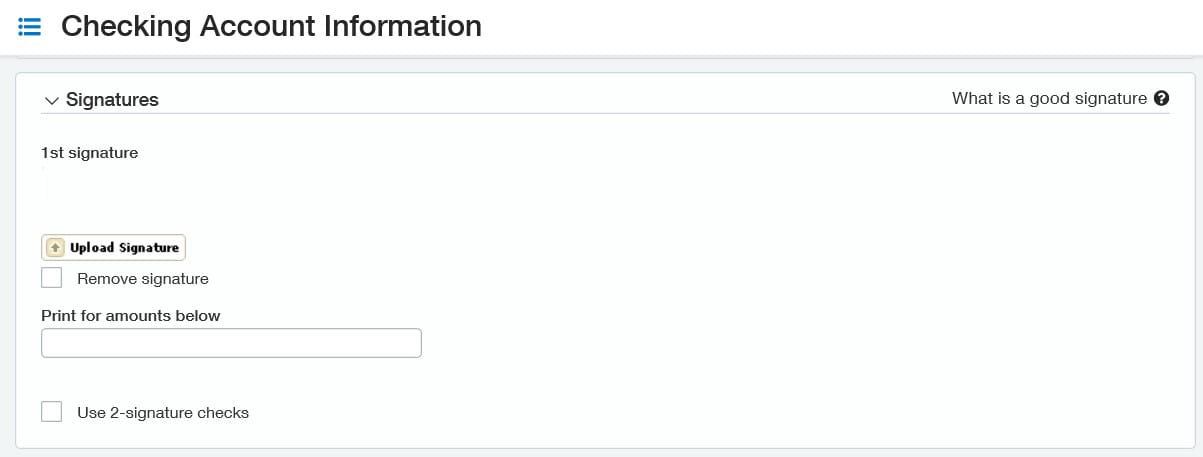
- Go to the Check printing tab, then scroll down to the Signatures section.
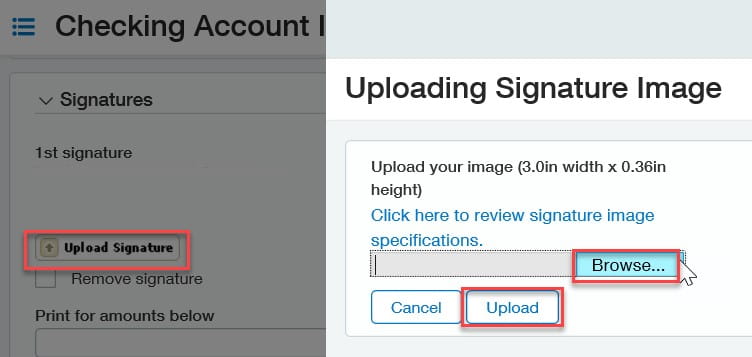
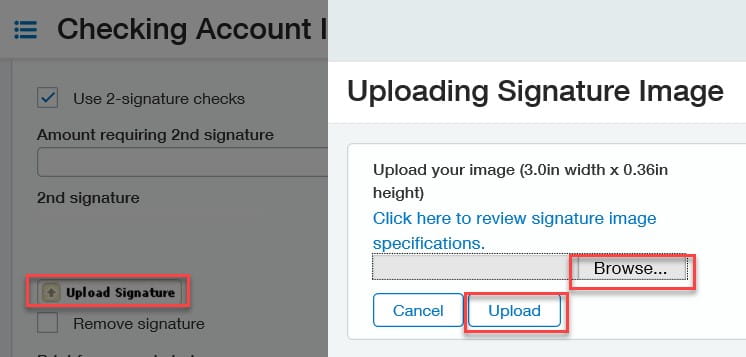
- Click Upload Signature. The Uploading Signature Image page appears. Click Browse, find the file with your signature, click Open, then click Upload.
- Verify the signature uploaded, then save the checking account.

Need a second check signature?
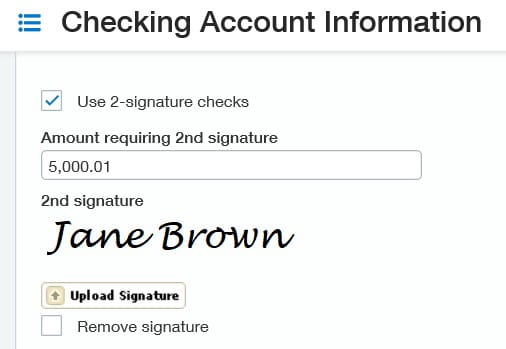
- Check the box next to “Use 2-signature checks,” then click Save.
- Edit the checking account again, click on Upload Signature and select your second signature.
- Type in the minimum amount that requires a second signature, then click Save.

Need help uploading signatures to checks?
Reach out to your Sage Intacct implementation consultant or log a support case in the Wipfli Service Center Portal.


